Frozen pipe solutions

The Lee’s Summit area recently went through a polar vortex. This isn’t too uncommon for us, unfortunately. As it came, the phones began to ring at Advocate Master Plumbing.

I had many conversations with scared home owners. The usual issue of frozen pipes or worse burst water pipes would be a discussion I’d repeat many times in the coming days. I’d begin each conversation with the same detailed & methodical questions.

What kind of water pipes do you have? If you have frozen pex pipes it’s unlikely you’ll have burst piping issues. Pex is a memory plastic that is burst resistant. Just get warm air around the affected plumbing fixtures and they should thaw without any damage.

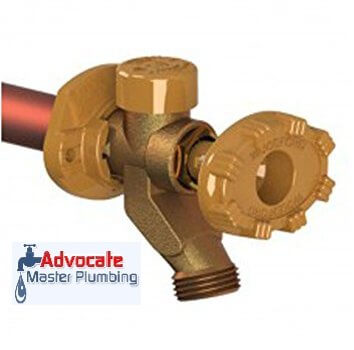
If you have copper or other rigid plastic water piping you could have a problem. Water changing state from liquid to solid creates pressures in excess of 100,000 psi. I’ve seen large commercial bronze water valves that looked like a mortar shell blew through them.

Is your frozen plumbing fixture above a cold garage? If so, open the door between your house & garage. Then place as many electric space heaters as you have in the garage. Leave the plumbing fixture affected turned on while someone is home. When the pipes thaw you’ll hear it.

Is your whole house without water? If so, this is likely a frozen water meter. This can easily be thawed by putting a halogen lamp or drop light into the water meter pit & sealing around the water meter lid with towels or blankets. Leave a faucet on while someone is home. It may take a few hours but it will thaw.

Fix the problem rather than leaving water running. In the spring find where the cold air is infiltrating your home and seal the air leaks. You may need heat tape and pipe insulation if you have a crawl space. Repair damaged water meter lids & rings. Be sure to get enough dirt around the meter ring that the meter lid is just above the dirt.

Owning a home is expensive and complicated sometimes. Insulate your home properly. Seal around house utility penetrations. Seal around your garage door.

I wouldn’t have a plumber in my house if I could avoid it. You do the same. But if you need help always feel free to call me. I’m Jerry Miller. I’m a master plumber and owner/operator of Advocate Master Plumbing.

Leaking Ceiling

Advocate Master Plumbing has been helping lees summit plumbing customers with leaking ceiling diagnostics for years. A ceiling water leak can be scary. Water streaming from a light fixture or water stains on your ceiling can just make you see dollar signs. Finding the cause of the leak doesn’t have to cost you anything. Let us show you how our plumbers approach ceiling leak detection.

A plumbers diagnostic approach to a leaking ceiling

When I get a plumbing service call for a leaking ceiling I already know what it might be. There are a few very common reasons for leaks. And while taking the call I always have some questions for the customer. Then when I arrive I let them vent a bit and tell me their story. Even though this is routine for me, it’s a major life event for them. Once they’re more relaxed I can begin the leak detection process. It always begin with further questions.

Where is your ceiling leaking?

This is an obvious question. And usually I’m told during my customers retelling of the events. A brownish water mark on the ceiling is a small leak. But a larger leak will include a long straight brownish line. This is pooled water finding a seam in the drywall.

Is there a bathroom above the leaking ceiling?

It’s uncommon for pipes to leak. It’s usually a plumbing connection to the pipes. So I always ask if there’s a bathroom above the leak. A leaking tub or shower is most common. A leaking toilet is also very common. Then I try to go deeper with my questioning.

Leaking tub

leaking bathtub waste and overflow drain assembly
tub waste & overflow

If I suspect a leaking tub I’ll first look at the caulking and grout around the tub. Caulking and grout are both temporary. They both need occasional maintenance or replacement. Shrinking caulk can actually channel water into the wall. And grout voids allow water to saturate backer board/drywall. The tile depends on this for structural integrity.

I’ll also check for a cracked tub or loose tub drain connection. And lastly, I’ll check for a loose overflow assembly or shower valve trim. This is usually easily repaired by either tightening a screw or sealing with silicone caulk. I’ll always use clear 100% silicone caulk. Clear because it’s easier to work with.

Leaking shower

Leaking shower, shower drain leak
Plastic shower drain

A shower leak will be checked the same as the tub leak. But I’ll also check the special shower drain. A cracked shower drain on the shower base is very common. The shower bases can sometimes flex when walked on. If the drains are made of plastic, the flange portion of the shower drain can crack or loosen. This will require a replacement. My preferred shower drain replacement is manufactured by Sioux Chief and is brass. This is a permanent repair.

Leaking toilet

Leaking toilet wax ring

A toilet leak can be caused from a multitude of things. To find the cause of a leaking toilet when water is on the floor you always look up. Follow the leak upward until there is no leak. Then look down. For more about this you can check the DIY toilet repair page.

A leaking ceiling that’s caused by a toilet will sometimes not show any water on the floor. If it’s a leaking toilet wax ring then that just requires a wax ring replacement. But if the toilet flange is too far below the floor you may need a flange extension. The wax isn’t meant to seal a large gap. It will sag over only a few years. But sometimes leaking toilet wax ring is due to a loose toilet caused by loose bolts or a cracked toilet flange.

Have you used the garden hose recently?

leaking spigot, burst hydrant
Frozen & burst sillcock

A burst sillcock can occur when a garden hose is left attached during cold weather. An older sillcock that isn’t frost free needs to be shut off inside the house and drained. But normally you’ll have a frost free hydrant style sillcock. They are specifically designed to drain themselves. This keeps the water pipe far from cold air. But they can’t drain if you leave the hose on. Trapped water freezes. As it freezes it builds pressure. Enough pressure to crack the brass sillcock housing. But a water leak will only occur when the sillcock is turned on. And it’ll leak inside while you’re outside wondering where all your water pressure went.

Have you been using the kitchen sink?

We all use the kitchen sink daily. But sometimes a large amount of water at the ceiling and wall connection can mean a cracked kitchen drain stack offset. The kitchen drain stack is a pipe that runs from under your sink, inside the wall and down to the basement. The kitchen sink is often on an exterior wall. But the wall is sitting on a concrete foundation. So the drain needs to offset about 6 inches to get around the top of the concrete wall. If you have black ABS plastic drain pipes it’s very possible this drain pipe has cracked. And the offsets are a weak point. This is especially true when there’s been settling in a house.

Frozen and burst water pipes

This isn’t a question. During cold weather a frozen pipe can burst and leak in a garage ceiling or along an exterior wall. Shower drains and tub drains can freeze and leak. Cold weather highlights the weaknesses in your home insulation. For more information about this you can go to How to Deal with Frozen Pipes to prevent this.

Leaking plumbing appliances

Normally a water heater will be on the lowest level of the home. This is also true of an hvac system or washing machine. But sometimes they aren’t. So check behind and under the washing machine. Test the drain for intermittent drain clogs. Check the water heater for leaks. They can have thermal expansion that will cause the relief valve to only leak occasionally. And an air conditioner condensate drain can back up. A condensate pan can clog creating water streaks down the side of the a/c. A furnace humidifier drain hose can clog or leak as well.

Some uncommon causes of leaking ceilings

When all else fails you look to the uncommon things. A roof offset near the ceiling leak can mean some roof flashing needs to be sealed. Leaking from a bathroom can be from an improperly sealed shower door or just splashing in the tub. A leak in the middle of the house with no plumbing fixtures around it can mean someone dropped some water on the floor or a water pipe leak or a leaking drain or vent pipe connection. I’ve even seen nails or screws that take years to rust away after penetrating a water or drain pipe.

Who fixes leaking ceilings

Finding the cause of a leaking ceiling is where a good plumber earns his pay. It can be frustrating trying to find the cause. And we don’t want to just start cutting holes in ceilings without being sure. But sometimes it’s all we can do. So in short, don’t hire a handyman for this. And don’t try to DIY this. A ceiling leak should be left to the professionals. Call your local Lees Summit plumber near you. Advocate Master Plumbing will perform a leak detection in a methodical and professional manner while minimizing damage to your home.

Frozen Pipe Repair

When winter comes and the winds kick up we plumbers are busy with frozen pipe repair. But sometimes you just can’t wait. In this article we’ll discuss how your local lee’s Summit plumbers deal with frozen pipe repair near you. Since soldering copper pipes is a skill most homeowners don’t possess and gluing water pipe can take too long, an alternative way will be discussed.

Push-to-connect fittings

How push-to-connect coupling works
Push-to-connect coupling

Push-to-connect fittings are a brass transition fitting. If you have to repair a pipe that’s either copper, pex or cpvc, these will work in a hurry. And when your water is shut off you’re always in a hurry. They work on the same premise as the old Chinese finger tricks. You push the pipe inside the fittings and a set of “teeth” shaped inward like sharks teeth hold onto the pipe to prevent it from coming out. An o-ring inside the fitting seals around the exterior of the pipe. This creates a water-tight seal.

How to use push-to-connect fittings

If these sound too easy then you’re partly right. For them to work you need to be sure the o-ring can seal onto the pipe securely. That means the pipe needs to be cut straight and the outside can’t have any solder, rough edges or nicks. It also means you need to be sure to push the pipe all the way into the fitting. Make a mark on the pipe showing the correct depth. And don’t allow any sharp edges to damage the o-ring as the pipe is inserted. Lastly, be sure the pipe and fitting stays straight. Any crooked angles or awkward stresses could mean a leak.

Frozen pipe repair with push-to-connect fittings

Every job demands the right tool. In this situation which tool you need depends on the type of pipe you’re working with. Since these fittings only work with copper, pex and cpvc we’ll discuss the necessary tools for working with them.

Cutting different types of pipe

To begin the repair you’ll need to shut your house water off and drain the water system down. Then you’ll have to cut out the damaged section of pipe. But first, let’s look at how to cut different types of common water pipe.

Copper pipe

Copper pipe is the most standard type of water pipe in homes these days. And since frozen pipes are routinely in tight spots, the usual tubing cutter won’t work. The Autocut copper tubing cutter is the tool of choice. It’s simple. It’s small for those tight spaces. And you don’t have to know a lot about plumbing to use them. You do, however, have to know if you’re working with. The size should be printed on the pipe.

Copper tube cutter
Autocut copper tube cutter

To cut with the Autocut copper tubing cutter you simply open the Autocut. Then attach it to the point on the pipe where you want to cut. Then following the directional arrow on the tool, rotate it around the pipe until the cutter wheel has completed the cut. Since you’re cutting out a section of pipe you cut the other side the same way. In this situation you’ll be cutting out the frozen and burst section of pipe.

Cross-linked polyethylene (PEX)

repair pex pipe
Plastic tube cutter

Pex pipe is becoming the most common pipe material in new home builds. It has a lot of advantages. One is it’s easy to work with. To cut this particular type of pipe you simply use a plastic tube cutter. Like the copper pipe, you cut out the burst section. There’s usually a little slack in this pipe. Because of this, you should be able to work with it pretty easily after cutting out the burst section.


Chlorinated Polyvinyl Chloride (CPVC)

cut cpvc pipe with a saw
Cutting CPVC pipe

Working with CPVC pipe is the same as working with pvc pipe. You can just use a saw to cut it. A plastic tubing cutter can be used for a cleaner cut. But it takes some work. If you choose to just saw this pipe be sure to clean the debris from the cut. But gluing this pipe really isn’t an option. You’re working with a pressurized water line. The glue will need 24 hours to cure. Most people won’t want to wait that long to get their water back on.

Repairing the pipe

push-to-connect coupling
Copper, PEX, CPVC pipe repair

After you have cut out the damaged pipe you’ll need to repair it. The easiest type of push-to-connect fitting for this repair is the slip repair coupling. These work easily by allowing you to replace the cut out section of pipe with just one fitting.

To begin, be sure your cut is no larger than 2 inches. Clean each end of the cut pipe. Place a mark on each end of the pipe noting the correct depth for insertion. This should be on the packaging. Push the “slip” end on first. Then using the specialty tool slide the the other end together. After the repair you’ll need to slowly turn on your house water to test for leaks. I prefer to partially turn it on. This will allow it to fill slowly and avoid stirring up debris. And if you have a leak it won’t be nearly as bad. Then turn the water the rest of the way on.

Who to call for a frozen pipe repair

When pipes freeze and burst it’s usually at a really bad time. Your water is shut off. You may have your insurance company on the phone. There probably have fans blowing and water restoration people walking around your home. It’s all you can do to keep your family calm. So you’ll want to call your local Lees Summit plumbers at Advocate Master Plumbing. We’ll be prompt, professional and fair. Now please enjoy this instructive video from Sharkbite regarding this repair.

What is a Sillcock

Sillcock, spigot, hydrant, outdoor faucet and hose bib all can mean the same thing. I’m not sure why we plumbers have so many different terms for the same thing. But man do we. In this case we’re talking about your hose connection that is mounted on the exterior of your home. In Lees Summit, Missouri we have to be aware of these every winter. If we don’t remove the hoses before the first hard freeze they’ll burst. A sillcock is a faucet that is mounted through the sill plate of your home. It gives you fresh drinking water to either drink, wash your car or water your garden.

Standard Sillcock

A standard sillcock is just a faucet with a handle and spout that’s mounted on the exterior of a house.

The water pipe that feeds the faucet is just inside the wall. With this type of sillcock there needs to be a water shutoff on the inside of the house. This allows it to be turned off and drained in the winter. If it isn’t, then it and the water pipe to which it’s attached will freeze and burst. You’ll usually only find these on older homes or homes in warmer climates.

Frost Free Sillcock

A frost free sillcock is also a faucet that provides water to the exterior of the home. It doesn’t need a water shut off, however. They have an extended stem that shuts the water off inside the home where the air is conditioned year round.

Leaking spigot
Outdoor faucet cover

Read more “What is a Sillcock”